- 主题
- 回帖
- 0
- 精华
- 注册时间
- 2009-2-18
- 最后登录
- 1970-1-1
- 在线时间
- 小时
- 爆棚声望
-
- PGB
-
|

楼主 |
发表于 2020-9-16 10:07
|
显示全部楼层
本帖最后由 taoa83920 于 2020-9-17 10:04 编辑
协作工具的使用:
第一步:
首先我们需要安装一款软件,叫做 GIT 它是协作的前奏
安装方法如下:
Git的安装 官网下载地址:https://git-scm.com/download
Git客户端安装过程 1、双击安装程序“Git-2.23.0-64-bit.exe”,显示截图如下:
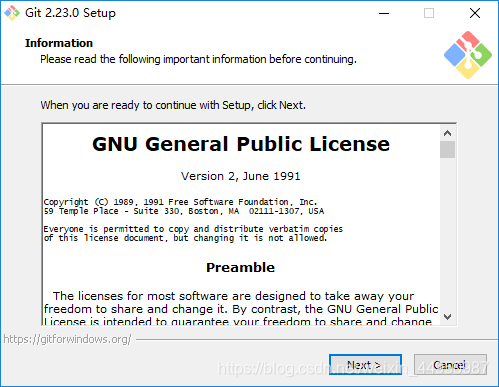
2、点击“Next”,显示截图如下:
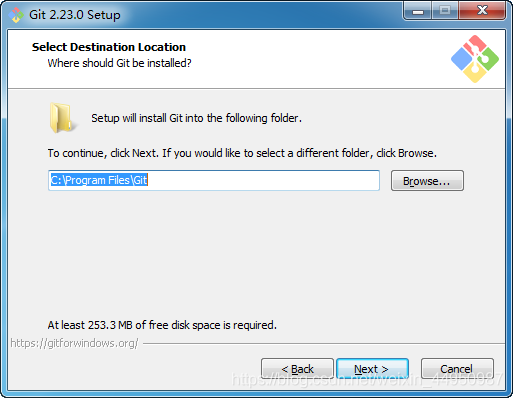
根据自己的情况,选择程序的安装目录。
3、继续点击“Next”,显示截图如下:
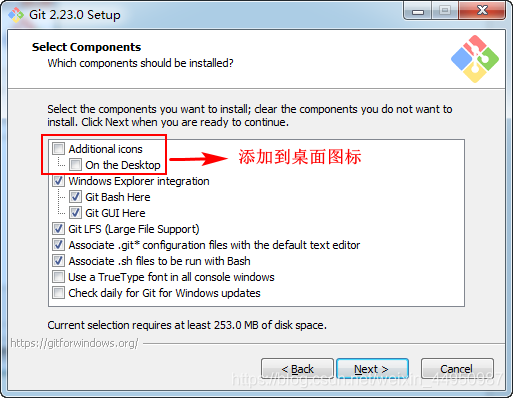
说明:
(1)图标组件(Addition icons) : 选择是否创建桌面快捷方式。
(2)桌面浏览(Windows Explorer integration) : 浏览源码的方法,使用bash 或者 使用Git GUI工具。
(3)关联配置文件 : 是否关联 git 配置文件, 该配置文件主要显示文本编辑器的样式。
(4)关联shell脚本文件 : 是否关联Bash命令行执行的脚本文件。
(5)使用TrueType编码 : 在命令行中是否使用TruthType编码, 该编码是微软和苹果公司制定的通用编码。
4、选择完之后,点击“Next”,显示截图如下:
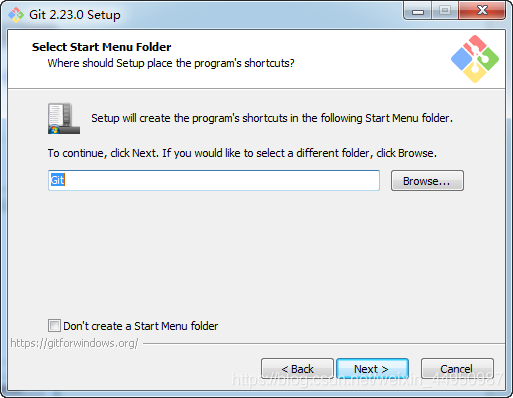
开始菜单快捷方式目录:设置开始菜单中快捷方式的目录名称, 也可以选择不在开始菜单中创建快捷方式。
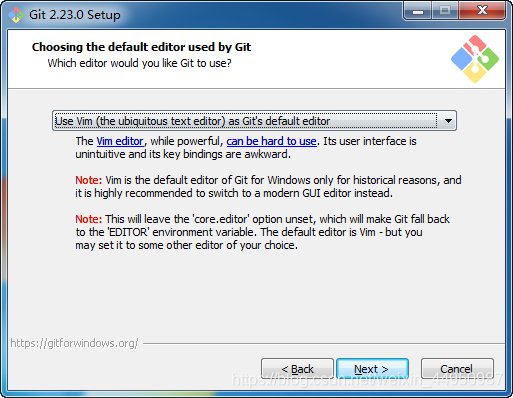
5、点击“Next”,显示截图如下:
选择编辑器,可以选vim,练练指令
6、点击“Next”,显示截图如下:
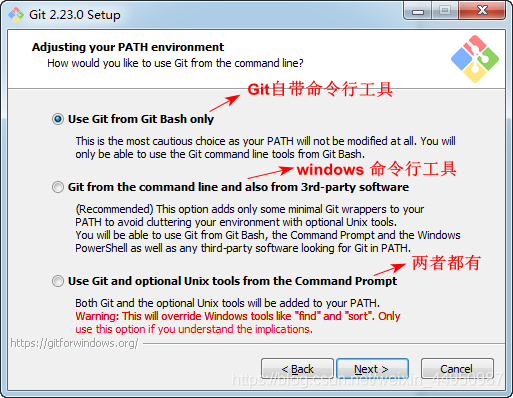
设置环境变量
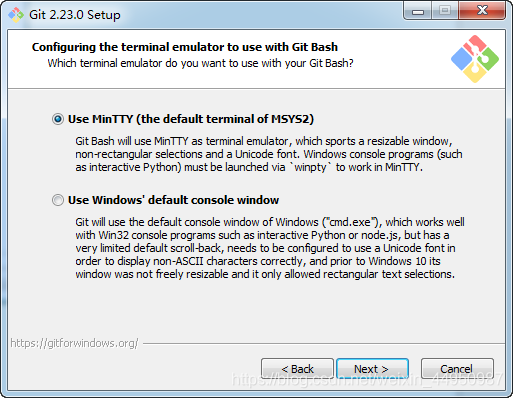
选择使用什么样的命令行工具,一般情况下我们默认使用Git Bash即可:
(1)Git自带:使用Git自带的Git Bash命令行工具。
(2)系统自带CMD:使用Windows系统的命令行工具。
(3)二者都有:上面二者同时配置,但是注意,这样会将windows中的find.exe 和 sort.exe工具覆盖,如果不懂这些尽量不要选择。
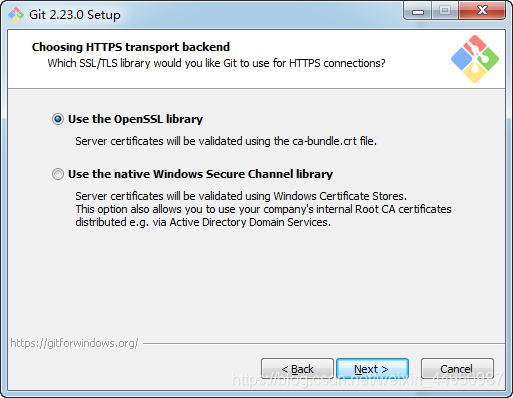
7、选择之后,继续点击“Next”,显示如下:
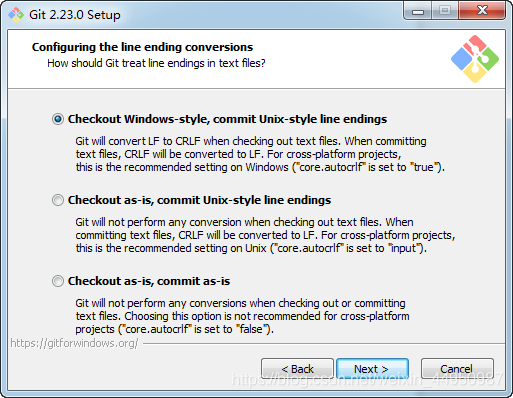
选择提交的时候换行格式
(1)检查出windows格式转换为unix格式:将windows格式的换行转为unix格式的换行再进行提交。
(2)检查出原来格式转为unix格式:不管什么格式的,一律转为unix格式的换行再进行提交。
(3)不进行格式转换 : 不进行转换,检查出什么,就提交什么。
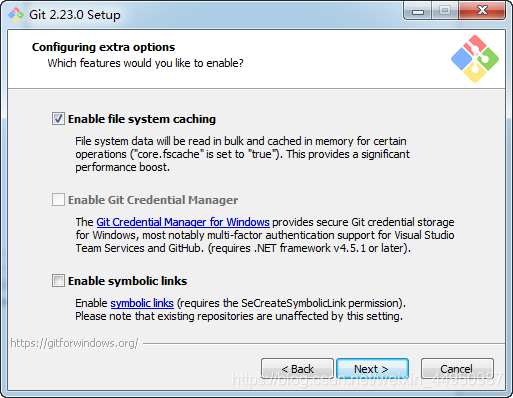
8、选择之后,点击“Next”,显示截图如下:
9、选择之后,点击“Next”,显示截图如下:
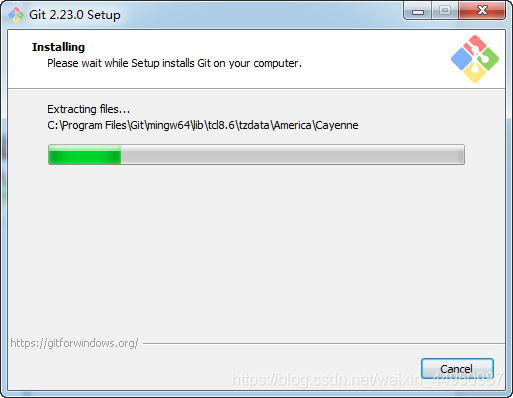
10、选择之后,点击“Install”,开始安装,截图显示如下:
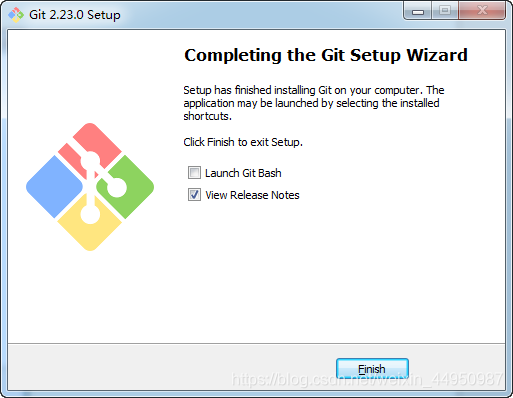
11、安装完成之后,显示截图如下:
以上是协作工具的安装,第一步。
第二步:
TortoiseGit 简称 tgit, 中文名海龟Git. 海龟git只支持神器 Windows 系统, 有一个前辈海龟SVN, TortoiseSVN和TortoiseGit都是非常优秀的开源的版本库客户端. 分为32位版与64位版.并且支持各种语言,包括简体中文(Chinese, simplified; zh_CN).
注意: XP系统已经不支持最新的安装包,请尽量使用 Win7 或更高版本的操作系统.
官方说明是: Windows XP 只兼容 1.8.16.0 及之前的版本: (last version which is compatible with Windows XP is 1.8.16.0;
1.TortoiseGit下载页面: https://tortoisegit.org/download/
2.打开下载页面后, 找到对应的 Latest stable release (最新稳定版) 目录,如当前为 2.4.0.2版本 , 点击进入对应的页面.

安装
1. 双击安装程序 . 弹出安装向导界面:

2.下一步,进入版权信息界面. 直接点击下一步(Next)即可.

3.下一步,选择SSH客户端. 可以选择 TortoiseGitPlink(位于TortoiseGit安装目录/bin 下), 也可以选择 Git 默认的SSH客户端,位于 Git安装目录/bin/ssh.exe(如果配置了 Path,那直接是 ssh.exe)

4. 接着是选择安装目录,可以保持默认,或者安装到开发环境目录下,安装的程序组件保持默认即可:

5.下一步到确认安装界面,点击 Install按钮安装即可,如下图所示:

6.安装完成,点击 Finish 按钮即可:

6.1 如果以前有老版本,则选择覆盖,关闭旧程序并尝试重启即可
7. 安装语言包 双击打开 ,则弹出语言包安装向导:

8. 点击下一步(Alt+N), 语言包会自动安装完成:

点击完成按钮即可
第三步:
打开https://gitee.com/,
注册一个帐号。
并打开https://gitee.com/taoa83920/fm2020-club-logos这个网站地址

然后在磁盘内,随便找个地方新建一个空文件夹

然后使用克隆命令

把之前的URL复制进来,点击确定,可能会需要你登陆帐号,登陆gitee帐号就行。然后克隆下来。

后续就是拉取和推送,拉取【拉取最新的包】,推送就是当自己的库有所改变时,推送自己的改变,当然推送前先提交。后续图晚点补充上来。
PS:每次推送更新前,建议先拉取最新数据。
|
|


 发表于 2020-9-16 09:34


.png)

.png)


 发表于 2020-9-16 19:50
