- 主题
- 回帖
- 0
- 精华
- 注册时间
- 2009-1-5
- 最后登录
- 1970-1-1
- 在线时间
- 小时
- 爆棚声望
-
- PGB
-
|
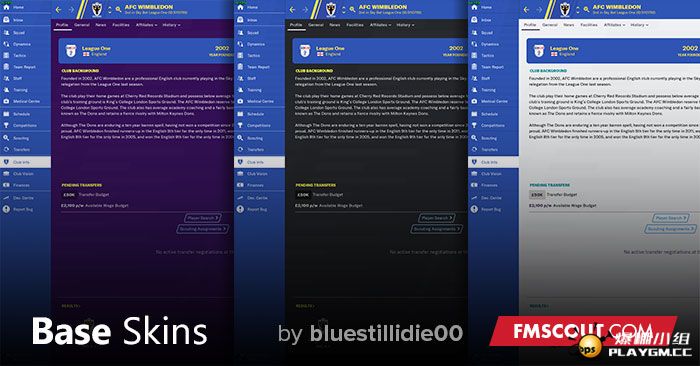
Base skins are identical to the default skins that come with Football Manager 2020, so you can customize what you want without messing up the original skins.

Official FM 2020 Base Skins
As with most recent Football Managers for you to make certain changes in Football Manager 2020 you need to create a new skin. Thankfully over the last few years some more stuff has been moved out of the skins folder so you only really need the Base skin if you are wanting to edit the skin graphics, fonts or colours. If you want to edit the match graphics or the most of the panel xml files you no longer need really need the base skins.
So to make things easier for people I've put up some base skins that are identical to the default skins that come with the game, so you can add new files/graphics to these without messing up the original skins, and anything that isn't located in these new skin folders will be taken from the default locations within the game.
FM 2020 has seen more changes to skinning than usual, the biggest being a new format for fonts, changing from *.xml to *,fontxml, Luckily old files work and just need renaming. You can do this by opening a Command Prompt in this folder and running the command
ren *.xml *.fontxml
For Football Manager 2020 you have three skins to choose from the Default skin, the Light skin and the Dark skin.
Base2020 Skin - This is the Default skin and is based on the Default Football Manager Skin.
Base2020 Dark Skin - This is the Dark Base Skin and is based on the Football Manager Dark Skin.
Base2020 Light Skin - This is the Light Base Skin and is based on the Football Manager Light Skin.
FM20 Base Skins - Install Instructions
How to Edit the Fonts
The font settings are now controlled by the various files located inside the fonts folder. For the base skins I have included all the default font files to save you having to go look for them. To edit the fonts its just a case of changing the various variables declared in the xml files, whilst to change the actual font you copy the font you want to use to the font folder and then update the font names in the xml files to match your new font.
How to Edit the Font Colours
The colour settings for each skin are controlled by the settings.xml file located inside the settings folder.
For the base skins I have copied in the relevant coding for you to change the various colours used by the skin – you just need to open the settings.xml file and locate the relevant line for the colour setting you wish to change – the colour names and comments should explain what the majority of the colours control.
The colours are declared in RGB values, that range from 0-255 where Red=255 Green=255 Blue=255 is white and Red=0 Green=0 Blue=0 is black.
To locate the RGB value of a colour you want to use you can either use a image editing program to obtain the RGB Value of the colour or type rgb values into google and it will bring up several websites that list the RGB Values for various colours.
Note that whilst this file contains most of the text colour settings, some items are hardcoded, others are determined by the individual xml files and some others are set by the xml files in the fonts folder.
Also if you have the Skin Cache on you can change some of the colours directly through the game from the Preferences -> Interface-> Skin Colours screen
How to Recolour the Game Colours
Like with the font colours these are now controlled via the files found in the settings folder, and are changed in the same way as the font colours.
For the base skins I have copied in the relevant coding for you to change the various colours used by the skin – you just need to open the settings.xml file and locate the relevant line for the colour setting you wish to change – the colour names and comments should explain what the majority of the colours control.
For your changes to take affect
If you have made any changes to the base skins (colours, fonts, graphics) to get your changes to show you’ll need to go into the Preferences -> Interface Menu and untick ‘Use caching to decrease page loading times’ if it is ticked and then tick ‘Reload skin when confirming changes in Preferences’ then click confirm and your changes should be applied, if you have previousily ticked and unticked the required boxes a 'Reload Skin' button should appear in the bottom left corner, if this button appears you can click that if the Confirm Button is grayed out.
|
|